
Sending letters has always been my thing, and when I moved out to Hong Kong, they became my primary means of communication between myself and one of my uni friends, and we continue to write letters to each other to this day!
Discovering the wealth of origami paper in Hong Kong, I started to make my own stationery. The process has gone through a wealth of evolutions, and now I can make a set of five in a pinch more than 30 minutes, if I’m not um-ing and ah-ing over the colour of paper.

My stationery sets started out as a small, colourful envelope with some complimentary A6 size writing sheets – the initial envelopes were a few millimetres smaller than the ones I make now. After moving to Korea, I discovered that they wouldn’t let something that small through the postal system, and so I added a second, larger envelope to my sets, and I’ve been using them ever since.
The added bonus of making a larger envelope is that I can utilise all the paper to make not only the envelope but a sheet of writing paper. This has to folded in a bi-fold style to fit into the envelope, but I think that it adds an extra level of fun, and it minimises waste! Of course, you can pad out this single sheet with as many as you like!
I thought it was about time I shared my template – you’ll find the Etsy link at the end of the post and on the shop page. Never has communication been so important, and sure we are so very, very lucky that we have technology to get us through the isolation, but in my opinion nothing beats a handwriting and homemade letter – even if you do have to quarantine it for three days!

You will need:
- Envelope template(s)
- Coloured A4 paper
- 15x15cm or 6x6in origami paper (or other patterned paper)
- 6mm double sided tape/roller tape or glue
- Scissors
- Ruler
- Pencil
- Folding bone

Let’s get stuck in!
Before doing anything else, I recommend laminating your envelope templates. I still have the first template I made, and the ones you see in these photos have been in use for years now – the first of many iterations. You might notice that my side flaps have a more angle corner cut than the top and bottom flats. This was my personal preference, and once your template is ready and laminated, nothing stops you from tweaking it to suit you!
Once you have your templates ready, it’s time to choose the orientation of the pattern for your inner envelope (or outer if your postal system can handle it) and trace it out.
This might take a little fudging as not all 15 x 15cm or 6 x 6 inch paper pads are equal, or even!


Before cutting out the notches and the end of the bottom flap, score the folding lines for the four flaps.


Now you can fold in the four flaps – edges first, followed by the bottom (with the flat edge) and the top (with the pointed edge. This is where the folding bone comes in. Use it to press down on the folded edges to make them nice and crisp.


Now add double sided tape or glue to the outer edges of the bottom flap only – shown in the image below), fold up and glue in place and your inner envelope is complete.

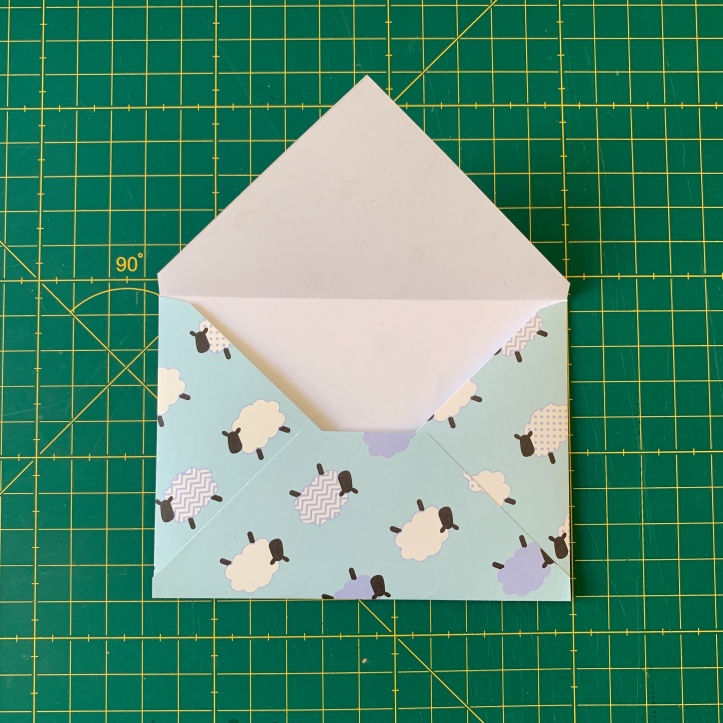
Next up, the large outer envelope. Line up the template with the bottom flap of the envelope nestled into a corner of the A4 sheet (see the image below). This provides the maximum straight edge to the right of the template. Use a ruler to fill in the gaps on this line so that it stretches the width of the page.


Cut down the line that will seperate envelope from writing paper and set side the writing paper segment. Before cutting out the envelope itself, score the folding lines. The process then follows that of the smaller envelope detailed above.

Now you have all three pieces of your envelope set, bi-fold the writing sheet, put it into the inner envelope, and you’re ready to go!


From making a a set of five, I produced the waste you can see below, and decided to make a paper chain from long strips, which is now hanging off my chest of drawers. I could see the triangles – large and small – being utilised to make a terazzo style bookmark: glue them onto card, run it through a laminator and cut to size!


So have a go, make the stationery of your dreams and spread that happy mail joy. Though, before signing off… where to find origami paper?!
The ones you see in this post were from The Works, however they don’t have the best stock online and the stock in each store varies. The best stores I’ve found have been Putney and Kendal, so go check them out when the open up again (observing good social distancing practice, obviously). I’ve also found the odd pack in poundland – again, each shop varies.
I’m a huge fan of Etsy and if you search for ‘origami paper‘ or ‘chiyogami paper‘, you’ll find all sorts. Some sellers ship from Japan, so you can find some really funky and beautiful ones on there! The ones from Japan are often a thinner paper rather than the slightly thicker paper that is more common in the UK.
Finally, a new website I found recently was Cratfelier. They are still shipping and have some beautiful paper!
When choosing your paper, the closer to 80gsm the better. I have used thicker paper, which works fine, but I still prefer lighter sheets.
As for colourful A4 paper, again you want to be looking for 80gsm paper. I’m still using alllll the paper I sourced in Korea – the colours they have out there are incredible and I’m already mourning the limited (in comparison) choice here.
When I do get round to having to replace my stash, I have two primary options: 1) The local paper warehouse back in Kendal – if you have a local paper mill near you, use it; and 2) paperchase’s spectrascope paper packs. There’s a brights pack and a pastel pack, which are great foundation.
If the need builds, however, I may have to just get onto Gmarket and get it sent from Korea – yes, I am that crafter!
TEMPLATES
If you fancy supporting This Geeky Tangent, pop over to the shop.

So many things!! First…I’ve never heard of a folding bone before. I wonder if that’s a “non crafter” thing…or just me being violently American. lol
Also…do you score the lines so that they fold easier? I’m thinking this might be something for Roselyn to do while she’s on the break from school and she’d really enjoy it!
Lastly, NO WASTE! I love that. You utilize the scraps elsewhere and this is good practice because it’s just more crafts you can do with the pieces not used in this!
Amazing as always.
I’m going to try some stuff with Rose and let you see the outcome…wonder how it’ll be LOL
LikeLiked by 1 person
Yes, always score before folding! I had no idea what it’s called – i think it has other names but that’s the first one I stumbled across so I’m rolling with it!
I’m pretty pleased with how this whole process has evolved over the years!
I wonder if Roselyn’s teacher would be open to the idea of penpals within her class (if they’ve not thought of that already?!)
LikeLike
[…] up, I posted all about my envelope templates and how I make my writing sets. This was a great craft to work on, and I decided to branch out and […]
LikeLike